
To adjust video quality, select Settings in the video player.
This is a tutorial on how to submit an Interest Discharge in OLS using the example of a full mortgage discharge when the financial institution sent you a completed and signed discharge form.
An interest discharge is the removal of a previously registered interest from a parcel, title, interest, interest share, or abstract.
This video depicts a basic scenario for demonstration and training purposes only.
NOT LEGAL ADVICE
This video is for demonstration purposes and is not intended to be legal advice.
ISC recommends seeking independent legal advice for all your land registry transactions.
Step One: Select the 'Interests' tab
Click on the 'Interests' tab to begin an Interest-related transaction.
Step Two: Find the Owner of the Title
Select the 'Owner Name' option in the 'Search By' drop down menu.
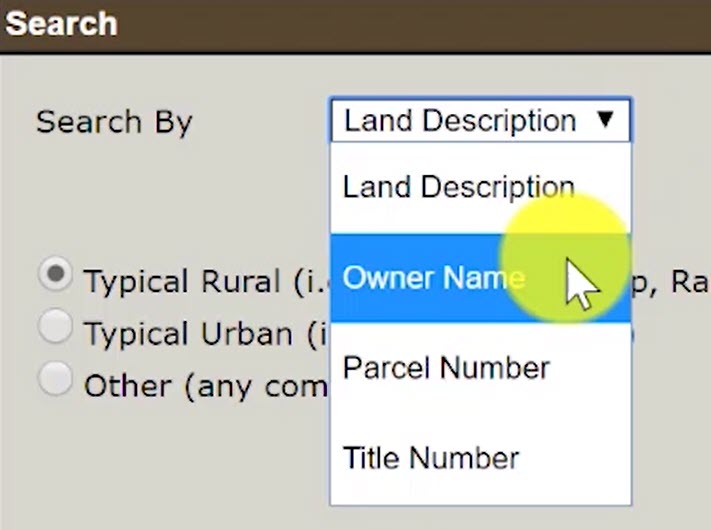
When the name fields appear, enter in the Owner Name.

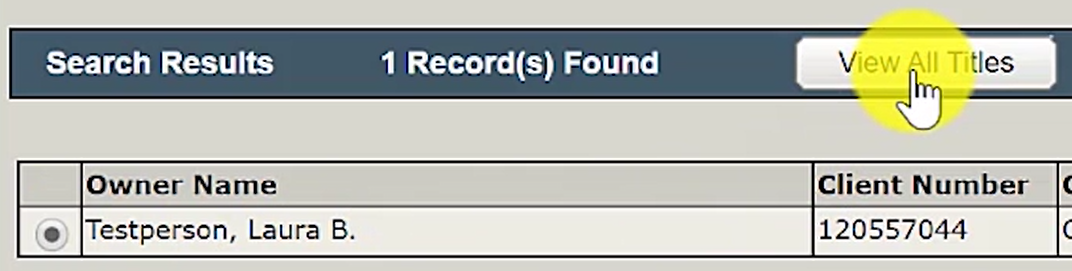
Step Three: View and Select the title with the mortgage
Select the correct Owner Name in the list of names that appear in the search results.
Then, click on the 'View All Titles' button.
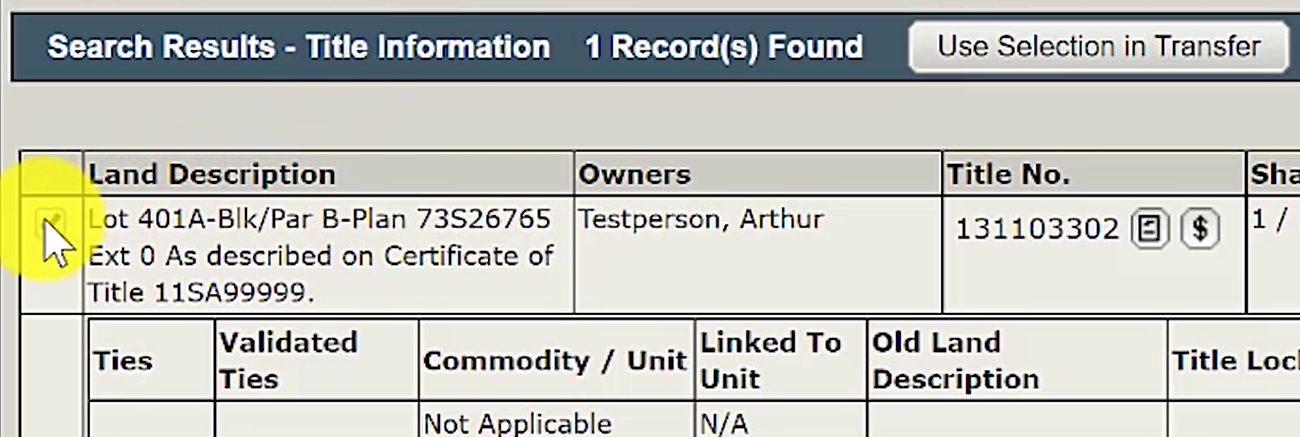
A list of all the titles owned by the selected Owner Name will appear in the search results.
Select the title with the mortgage to be discharged.
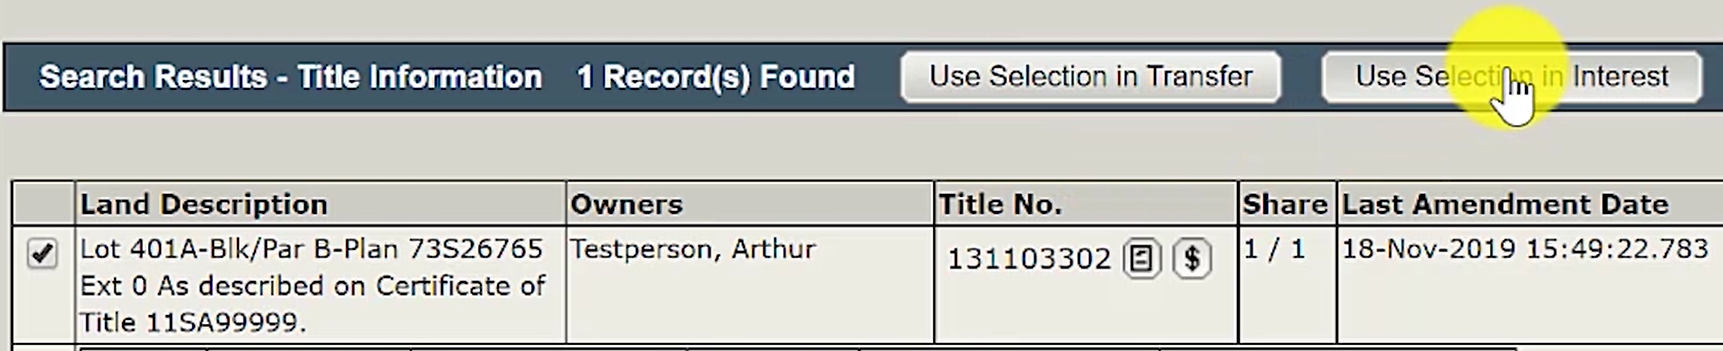
Once the title is selected, click on 'Use Selection in Interest'.
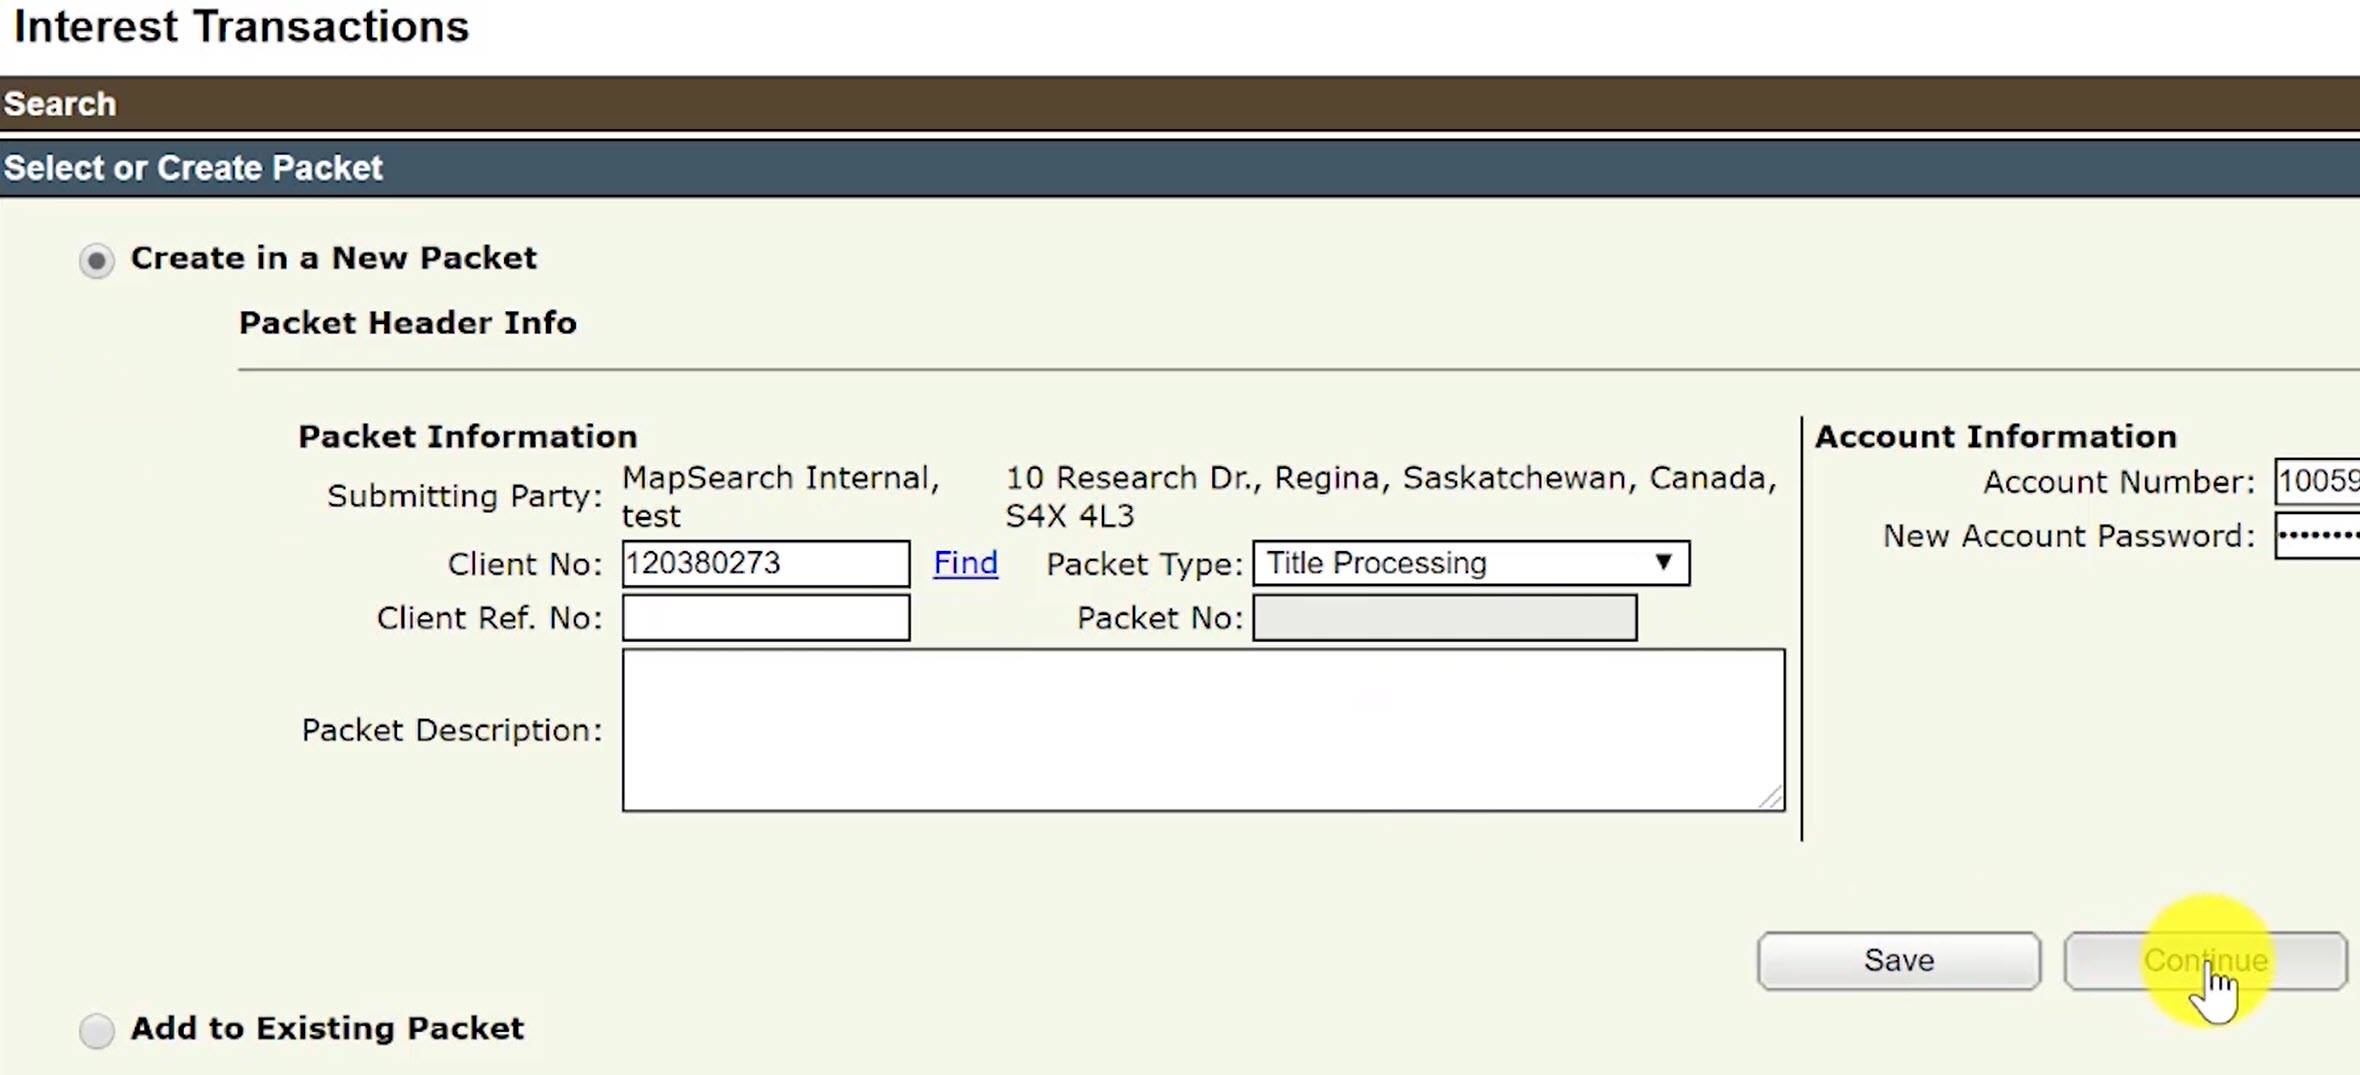
Step Four: Create a New Packet
Click on the radio button next to 'Create in a New Packet' to create a new packet for the interest discharge.
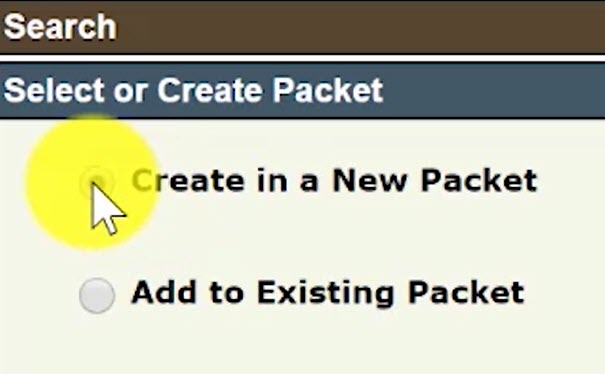
You may enter in a packet description to help you identify the packet in the future within your packet management list. This is optional.
Click the 'Continue' button.
Step Five: Select Transaction Type - Interest Discharge
Under the 'New Interest Transaction' section, select the transaction type 'Interest Discharge'.

Then, click on 'Create' in order to open up the Interest Discharge section.
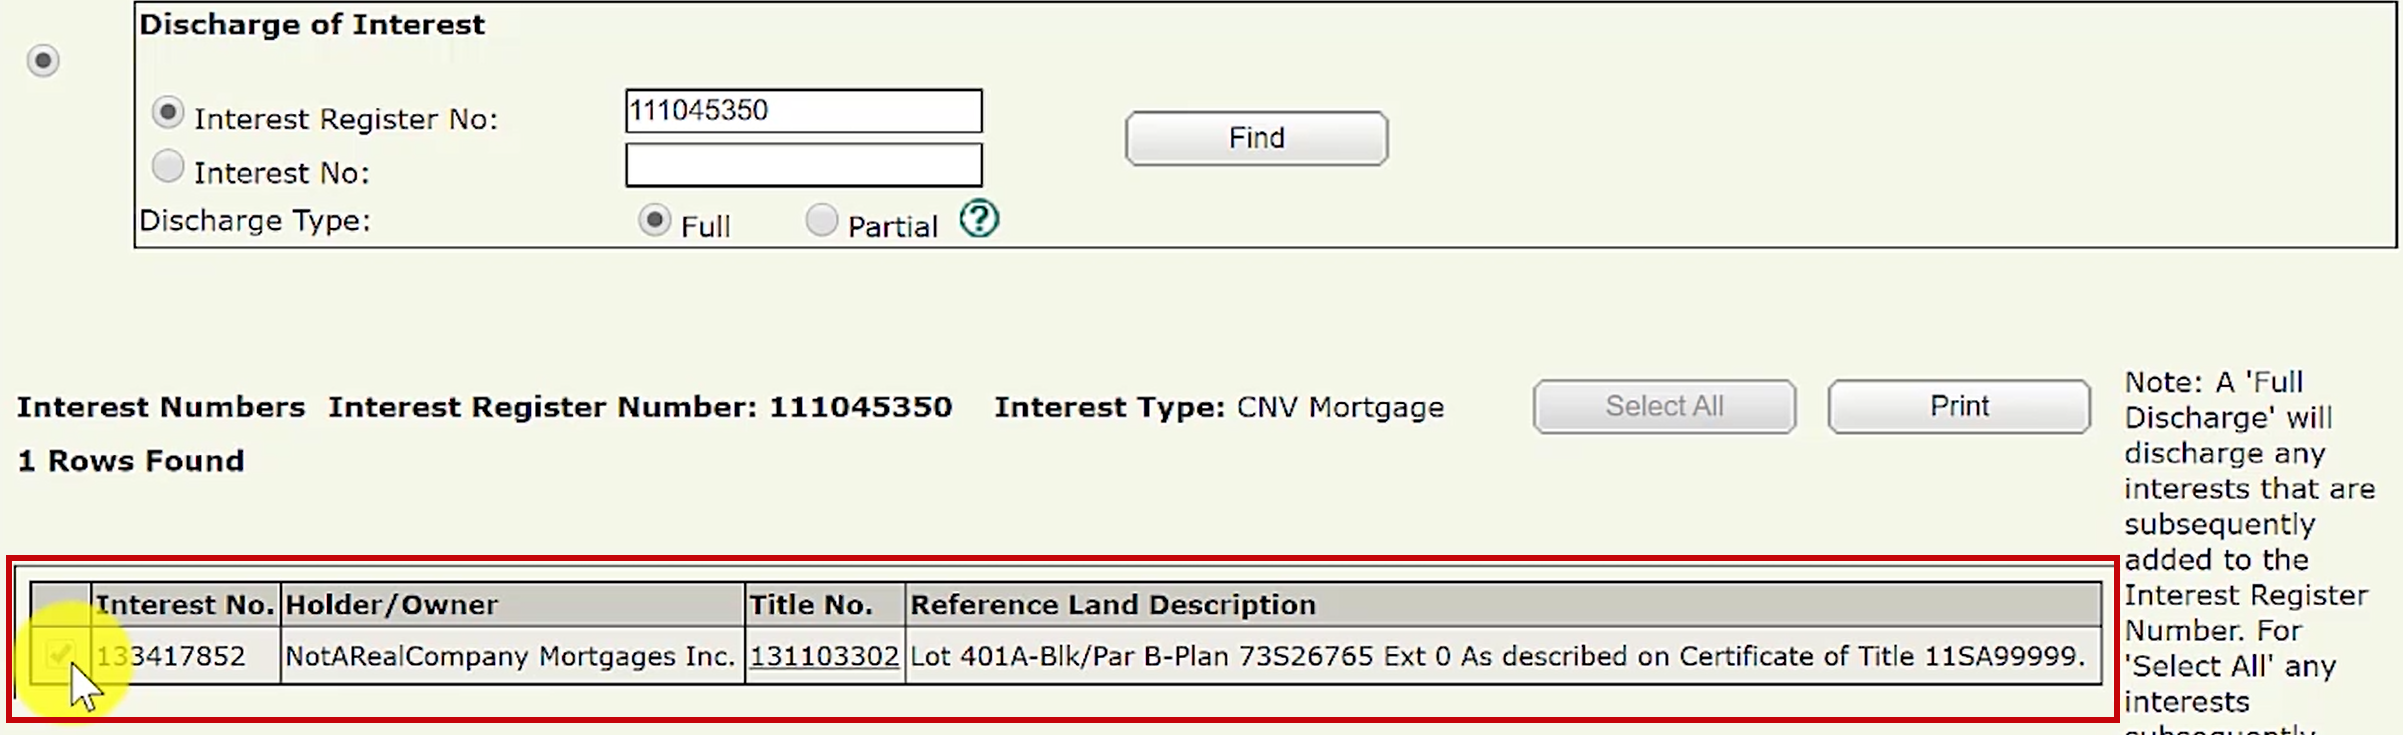
Step Six: Enter an Interest Register Number and Select Discharge Type
Enter the Interest Register Number for the interest being discharged into the 'Interest Register No:' field.
The Interest Register Number for the interest can be found on the land title.
For example: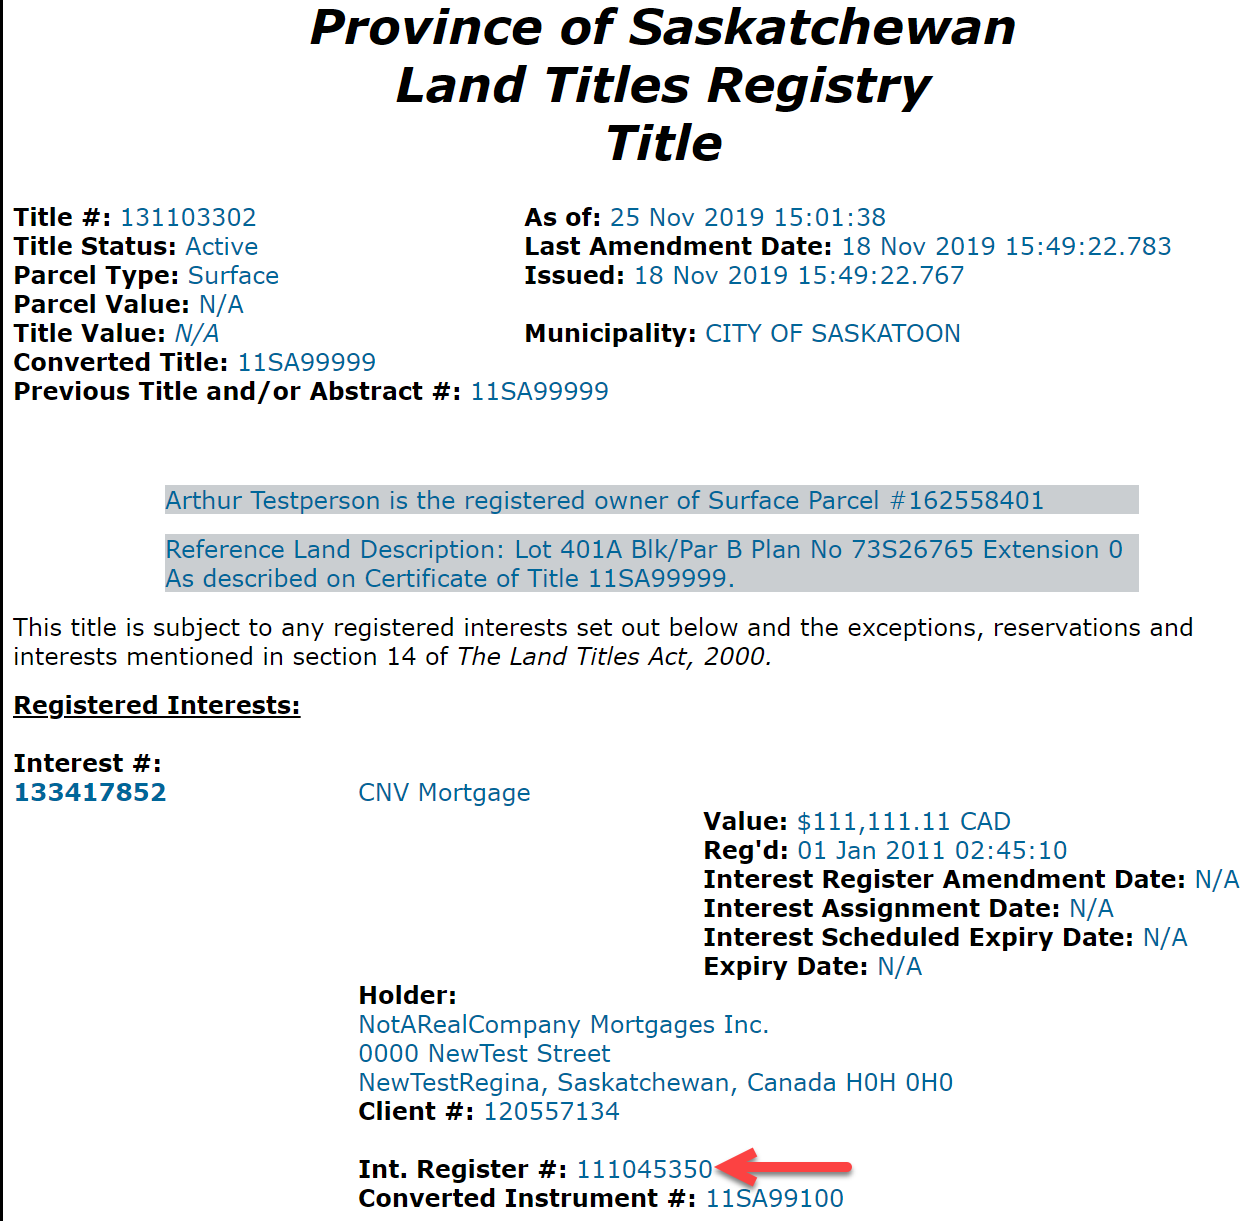
Next, select 'Full' as the 'Discharge Type' since this will be a full discharge of an interest (mortgage).
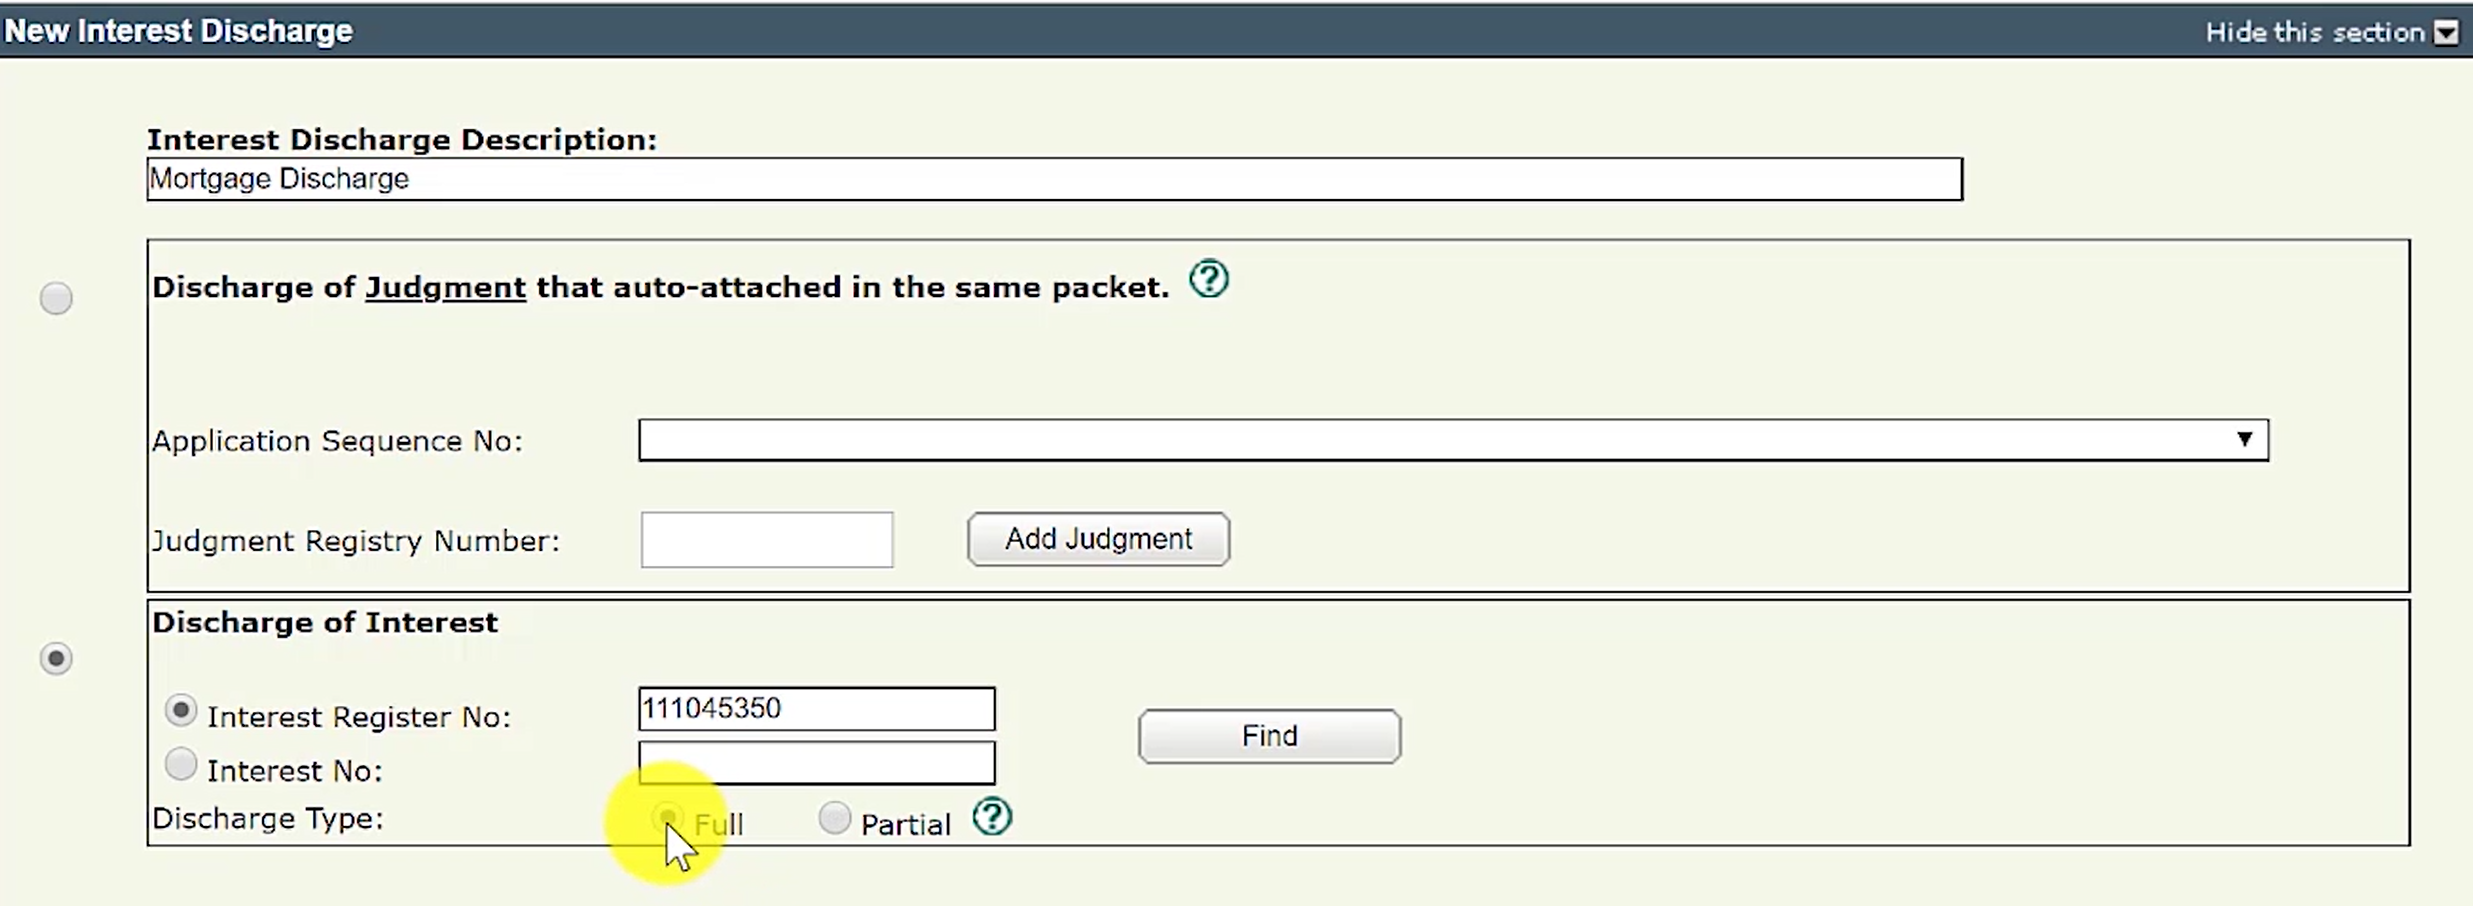
Then, click the 'Find' button. The interest (mortgage) should appear in the search results. Ensure that the correct Interest Number is checked off.
Step Seven: Upload Required Documents
The required document for a full mortgage discharge is the following:
1) Interest Authorization Form.
In this scenario, the financial institution sent us a completed and signed discharge form. After scanning it and creating an image document, upload it into the packet.
To upload a document, click on the button 'New Upload' in the 'Manage Authorizations and Attachments' section.
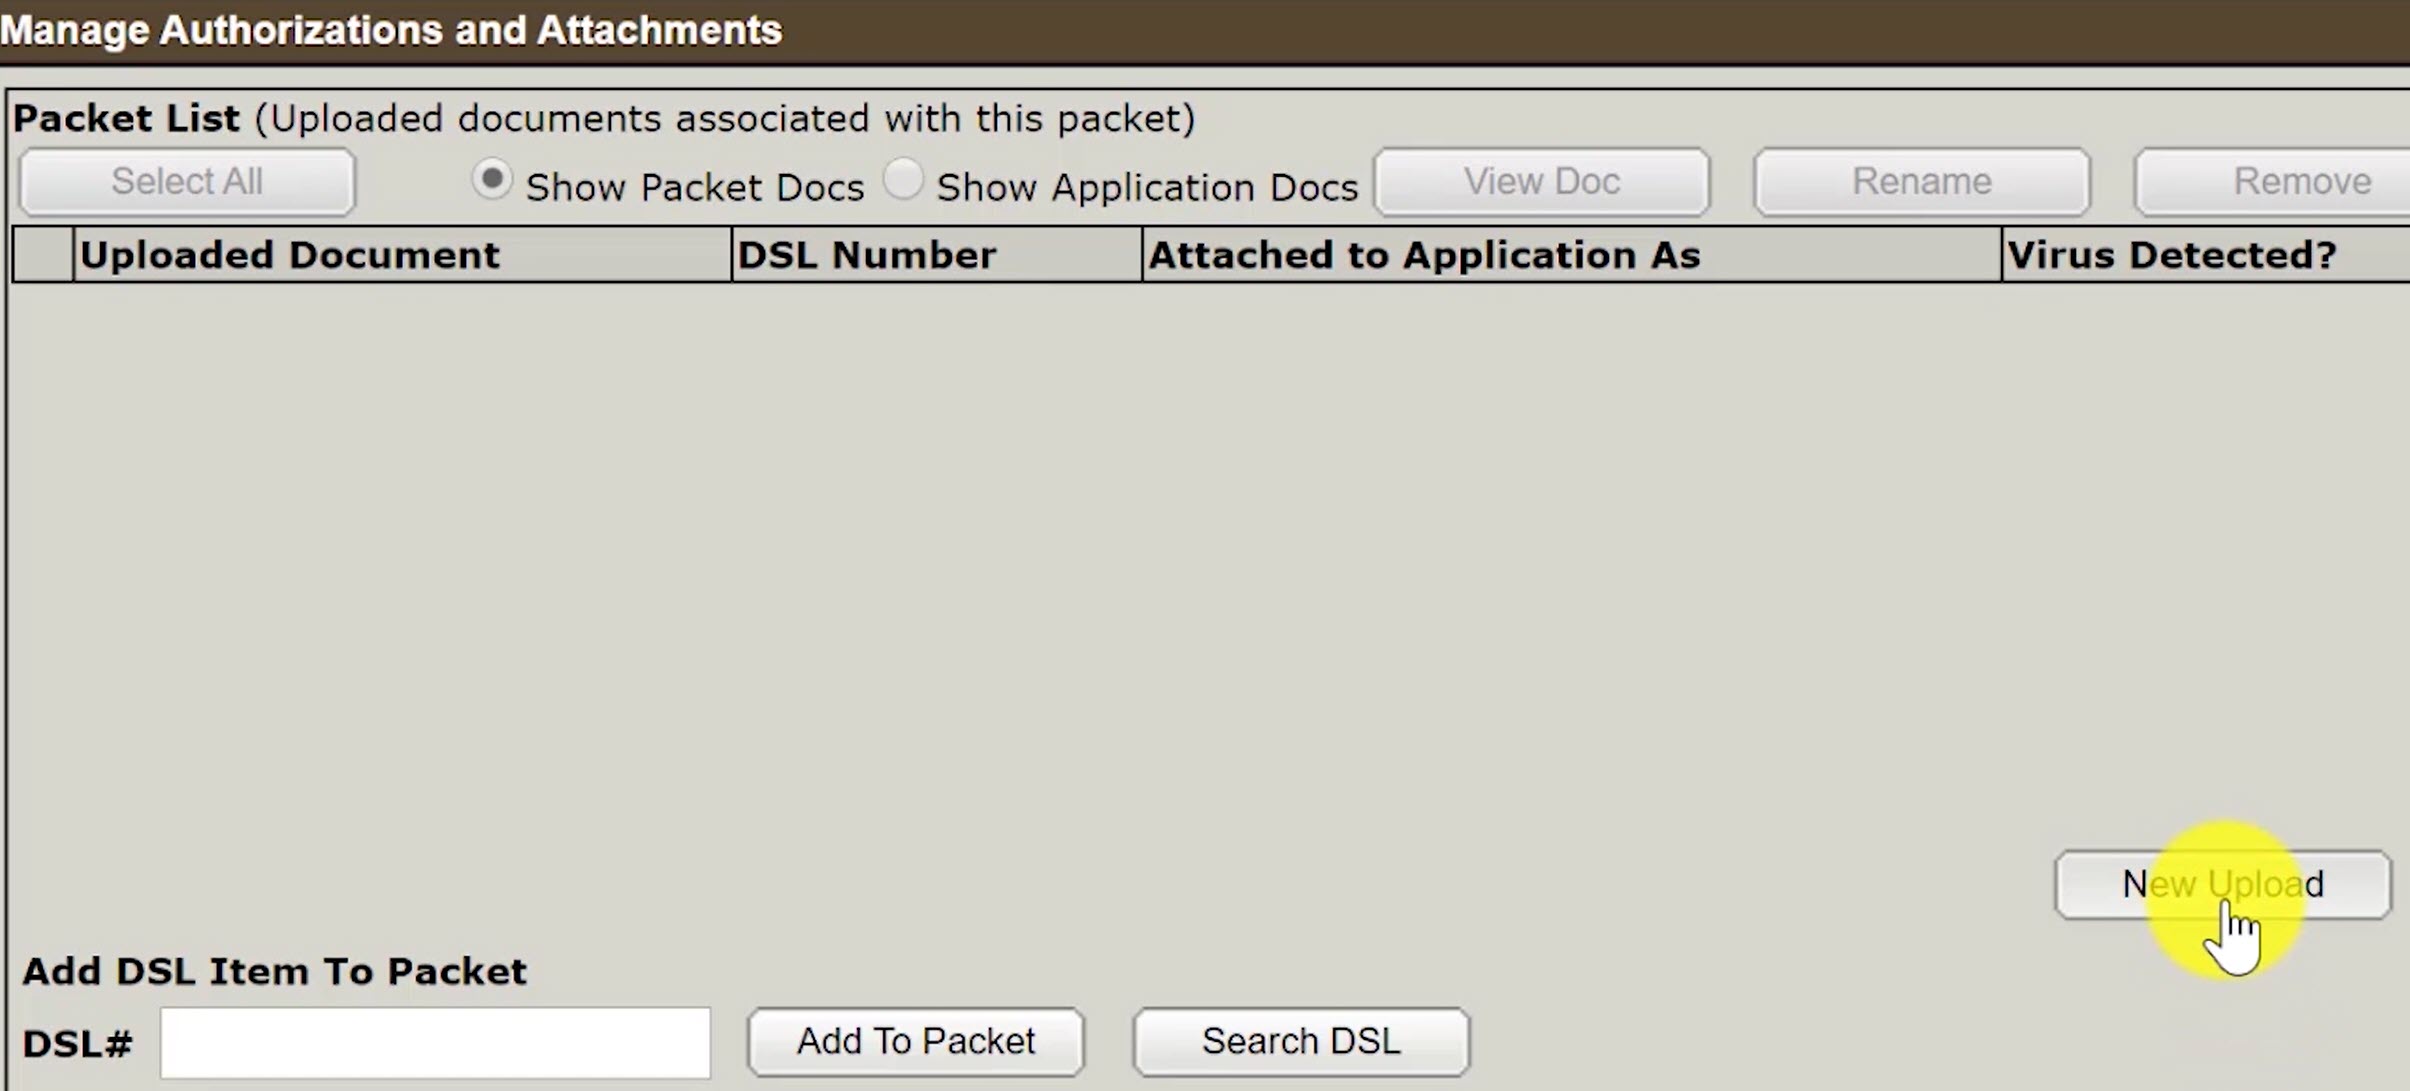
A popup window will appear for you to upload for interest authorization form.
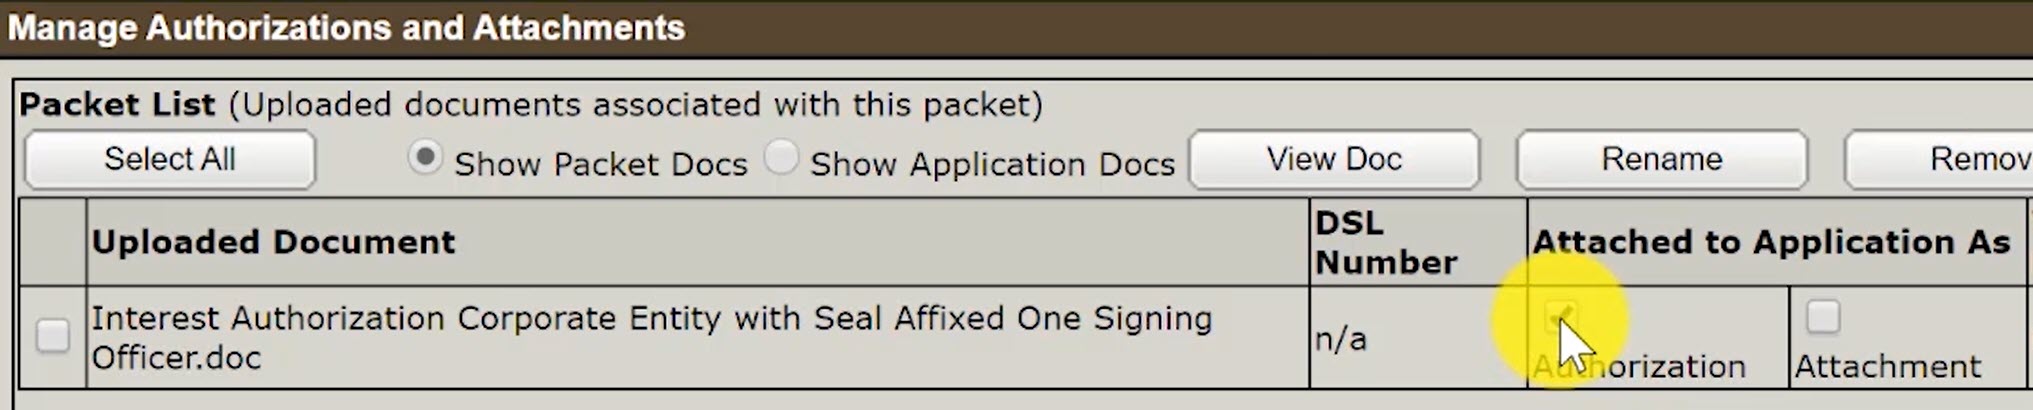
Once the authorization form has been uploaded, label it as an 'Authorization'.
Step Eight: Validate your packet
Validate your packet by clicking on the 'Validate' button.

You should Validate your application when you are satisfied that all required elements are correct. The validation process puts the packet through automated checks to help you ensure your application meets all the required business rules.
If errors are encountered, a message box will appear to let you know there were errors or warnings during the validation.

Click on the 'OK' and scroll down to the 'Validation Errors' section to see what errors were encountered.

The 'Validation Errors' section might be hidden. Select the 'Show this section' to reveal the errors.
Validation generally takes a couple of minutes depending on the size of your packet.
If there are no errors, you will receive an alert that there were no errors or warnings encountered during the validation.

Step Nine: Submit Your Packet
Click on the 'Create Summary Report' button to create a summary report of your packet. The summary report will give you the opportunity to verify the accuracy of your packet.

Once you have reviewed your summary report and are satisfied with the packet content, click on the 'Submit Packet' button to submit your packet.
Click on the 'OK' button to submit the packet.